
Patio Installation Guide: Costs, Steps, and Pro Tips
Discover the essential steps, material choices, and costs for patio installation. Learn how to hire the right pro and get your dream outdoor space.

By Sarah Thomas
Learn more about Patio Remodel or Addition for guides, costs, and what to expect.
Compare Patio Remodel or Addition Pros Near You

Enter your ZIP code to compare top-rated local professionals and request free quotes.
Dreaming of a backyard oasis but unsure where to start? A well-designed patio can transform your outdoor space into the perfect spot for family gatherings, quiet mornings, and summer barbecues. However, patio installation is a significant project that involves careful planning, smart budgeting, and often, professional help. This guide walks you through every stage, from initial design to final sealant, so you can make informed decisions and avoid costly surprises.
Whether you are installing a simple concrete slab or an intricate paver design, the choices you make early on affect your project's cost, timeline, and longevity. Many homeowners find that working with a professional contractor simplifies the process, especially when they can compare free quotes from vetted local experts. By understanding the fundamentals, you will be ready to discuss your project with confidence and choose the right path for your home and budget.
Why Patio Installation Is a Smart Home Investment
A patio is more than just an outdoor floor. It extends your living space, increases your home's value, and creates a functional area for relaxation and entertainment. According to industry studies, a well-installed patio can return a significant portion of its cost in added home value, making it one of the more rewarding outdoor upgrades. Beyond resale value, a patio reduces wear on your lawn, provides a stable surface for furniture and grills, and can even improve drainage around your home.
From a lifestyle perspective, a patio gives you a dedicated space for dining, reading, or playing with kids and pets. It also serves as a visual anchor for your landscape, tying together garden beds, pathways, and outdoor lighting. When planned well, a patio becomes an extension of your home's architecture, creating a seamless transition between indoor comfort and outdoor freedom. This is why thoughtful patio installation is a priority for many homeowners planning outdoor improvements.
Choosing the Right Patio Material
Selecting the material for your patio is the most impactful decision you will make, as it directly influences the look, durability, and maintenance needs of your outdoor space. Each option has its own advantages and trade-offs in terms of cost, aesthetics, and longevity. Below is a breakdown of the most common patio materials to help you compare your options.
- Concrete: Affordable, versatile, and low maintenance. Can be stamped or stained to mimic more expensive materials.
- Pavers (concrete or brick): Extremely durable and easy to repair individually. Offer a classic, upscale look with a wide range of patterns and colors.
- Natural stone (flagstone, travertine, slate): Premium appearance and unique texture. Higher cost and requires professional installation for best results.
- Gravel or pea stone: Most budget-friendly option. Simple to install but requires edging and periodic replenishment.
- Tile (porcelain or ceramic): Great for covered patios or sunrooms. Offers a smooth, clean finish but can be slippery when wet.
After weighing these options, consider your local climate, the amount of shade your yard receives, and how much maintenance you are willing to do. For example, in freeze-thaw climates, pavers and concrete are more reliable than some natural stones that may crack. On the other hand, if you live in a hot, sunny area, lighter-colored materials will stay cooler underfoot. Your choice should also complement your home's exterior colors and architectural style to create a cohesive look.
Understanding the Cost of Patio Installation
The price of patio installation varies widely based on material, size, site preparation, and labor rates in your region. On average, homeowners spend between $2,500 and $10,000 for a 300 to 400 square foot patio, with most projects falling in the $5,000 range. Concrete patios tend to be the least expensive upfront, while natural stone and premium pavers sit at the higher end. Additional costs can include removing an old patio, grading the site, and adding features like lighting or a fire pit.
To avoid surprises, always request detailed quotes from multiple contractors. A free estimate from a local professional will give you a realistic picture of the total investment, including materials and labor. Be wary of quotes that seem too good to be true; they often signal low-quality materials or inexperienced labor. Instead, focus on value, which means balancing cost with craftsmanship and the longevity of the finished product.
The Patio Installation Process: Step by Step
A successful patio installation follows a structured process that ensures a stable, level, and long-lasting result. While the specifics vary by material and site, the core steps remain consistent. Here is a breakdown of what you can expect during a typical professional installation.
- Site Assessment and Design: The contractor evaluates your yard, checks drainage, and discusses your vision, including size, shape, and material preferences.
- Excavation and Grading: The area is dug out to the required depth, typically 6 to 8 inches for paver bases. The soil is leveled and sloped away from your home to prevent water pooling.
- Base Layer Installation: A compacted gravel base is laid and compacted to create a stable foundation. Sand is then added for pavers or a vapor barrier for concrete.
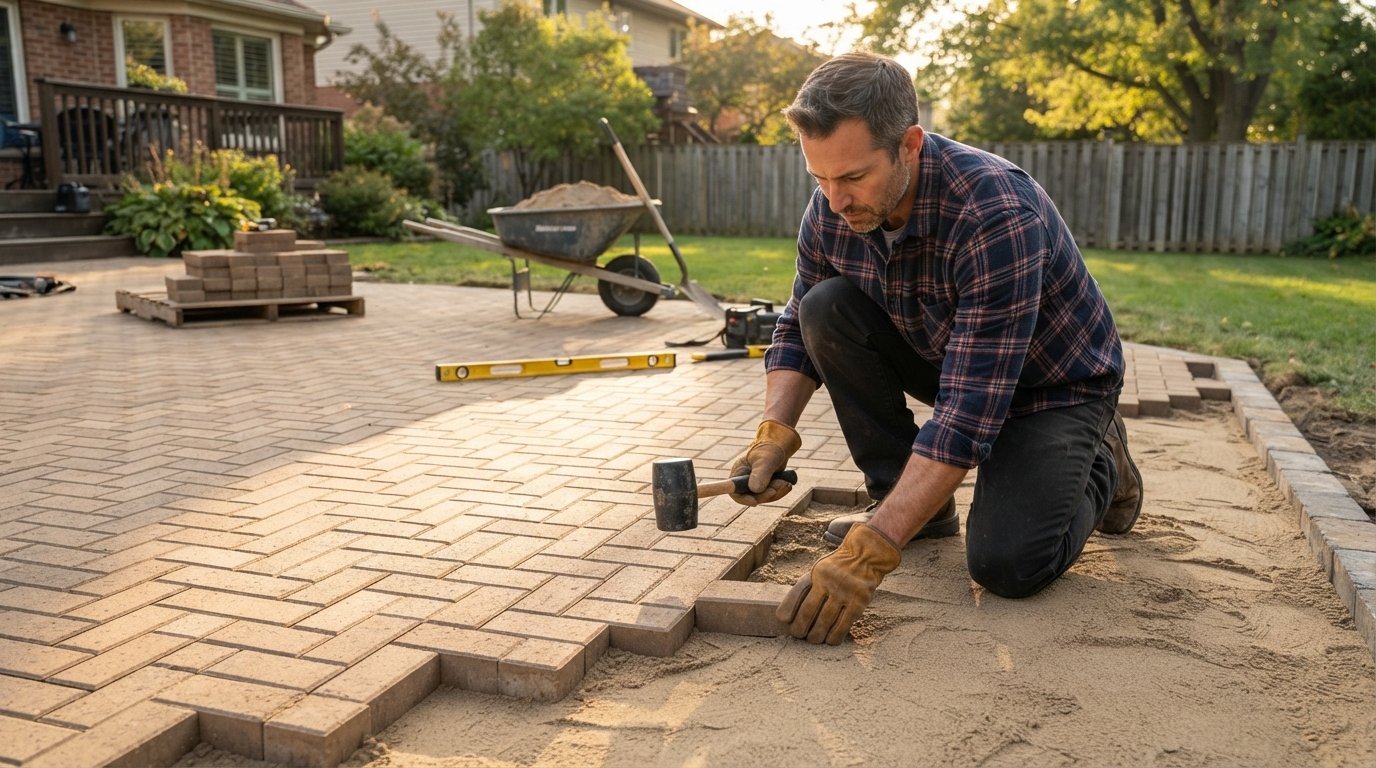
- Material Installation: Pavers are laid in your chosen pattern, or concrete is poured, leveled, and finished. For natural stone, each piece is set and leveled individually.
- Edge Restraints and Finishing: Edging is installed to hold pavers in place. Joint sand is swept into paver gaps, and the entire surface is compacted. For concrete, control joints are cut, and a sealer may be applied.
After the installation, proper curing is essential. For concrete, this means keeping the surface moist for several days. For pavers, you should avoid heavy traffic for at least 24 hours. A good contractor will walk you through post-installation care, but you also need to plan for regular maintenance like sweeping, occasional power washing, and resealing every few years to keep your patio looking its best.
DIY vs. Hiring a Professional Contractor
Many homeowners wonder whether they can save money by installing their patio themselves. While a simple gravel or concrete project might be within reach for a skilled DIYer, patio installation is labor-intensive and requires specialized tools and knowledge. Improper base preparation is the most common cause of paver settling and cracking, which leads to costly repairs later. If you have limited experience with hardscaping, hiring a professional is often the safer investment.
Professional contractors bring efficiency, precision, and access to better materials. They also handle permits, utility line checks, and unexpected site conditions, such as buried rocks or poor soil. When you hire a vetted contractor, you protect yourself with warranties and insurance. To find the right pro, get multiple free estimates, check references, and confirm they are licensed and insured. This diligence pays off in a patio that stands the test of time.
Permits, Codes, and Practical Considerations
Before breaking ground, check with your local building department to see if a permit is required for patio installation. Many municipalities require permits for patios over a certain size or if you are adding a roof or permanent structure. Your contractor should be familiar with local codes and can handle the permit process on your behalf. Skipping this step can result in fines, forced removal, or issues when you sell your home.
You also need to consider the location of underground utilities. Always call your local utility locating service before digging. This free service marks buried lines, preventing accidental damage and ensuring safety. Additionally, think about drainage: your patio should slope away from your home's foundation to direct water flow. A professional will grade the site properly, but if you are going the DIY route, pay close attention to this detail.
Enhancing Your Patio: Add-Ons and Design Ideas
Once the patio structure is in place, you can elevate its function and beauty with thoughtful add-ons. Outdoor lighting, for example, extends usability into the evening and highlights architectural features. String lights, path lights, and built-in LED strips are popular choices. A built-in fire pit or outdoor kitchen adds a focal point and makes your patio a true gathering spot. These features, however, require additional planning and wiring, so consult your contractor about integrating them during the initial installation phase.
Furniture and landscaping also play a huge role in how your patio feels. Choose weather-resistant materials like teak, aluminum, or all-weather wicker. Add cushions and outdoor rugs for comfort and color. Planters, shrubs, and a border of mulch or river rock soften the edges and blend the patio into your yard. Remember to leave enough space for walking paths and keep furniture arrangement flexible for different occasions. With the right design choices, your patio becomes an outdoor room that reflects your style.
Finding the Right Contractor for Your Patio Project
Choosing the right contractor is the most important step to ensuring a smooth and successful patio installation. Start by asking friends, family, and neighbors for recommendations, then supplement with online research. Look for contractors who specialize in hardscaping and have a portfolio of completed patios. Read reviews on platforms like Google and Houzz, and check their standing with the Better Business Bureau.
When interviewing potential contractors, ask about their experience with your chosen material, request a timeline, and ask for a detailed written estimate. Ensure the quote includes site preparation, materials, labor, cleanup, and any permit fees. A trustworthy contractor will be transparent about potential extra costs and will not pressure you to sign immediately. Getting multiple free quotes is the best way to compare pricing and gauge each contractor's professionalism. This approach helps you feel confident in your choice and ensures you get the best value for your investment.
Once you have selected a contractor, maintain clear communication throughout the project. Confirm the start date, delivery of materials, and daily work hours. Be present for the initial site walkthrough and the final inspection. Address any concerns promptly, and do not make the final payment until you are satisfied with the work. A good contractor will stand behind their craftsmanship and leave you with a patio you will enjoy for decades.
Ready to start your patio project? The best first step is to compare options from local professionals. Request free, no-obligation quotes from experienced patio installers in your area. With the right team and a clear plan, you will soon be enjoying your new outdoor living space with family and friends.